


Stecker Machine Blog

Why Is My Sink Stopper Not Working Properly?

A Sink Stopper should hold water securely, release it smoothly, and stay aligned beneath the drain. When it fails, the problem may seem minor, but a slow leak can waste water and leave stains around the basin. You may notice water draining too quickly, a handle that feels loose, or a stopper that will not lift. These symptoms often point to worn parts, trapped debris, poor adjustment, or damage beneath the sink.

Small details matter. A strand of hair around the stopper rod can prevent a tight seal. Mineral deposits may roughen the stopper’s underside. A bent pivot rod can also reduce movement, even when the lift handle appears normal. In my experience, people often replace the entire assembly too soon. That can waste time and overlook a simple adjustment. Still, visual checks are not always enough. A hidden crack or corroded linkage may require closer inspection.

This guide examines why your Sink Stopper is not working properly and explains practical ways to identify the cause. You will learn what to check, which parts commonly fail, and when repair is more sensible than replacement. Work gently around the drain and cabinet connections. Forcing a stuck component can damage threads or porcelain. A careful diagnosis is usually faster, safer, and more reliable than guessing. Expect a few surprises. Plumbing problems rarely follow a perfect pattern.
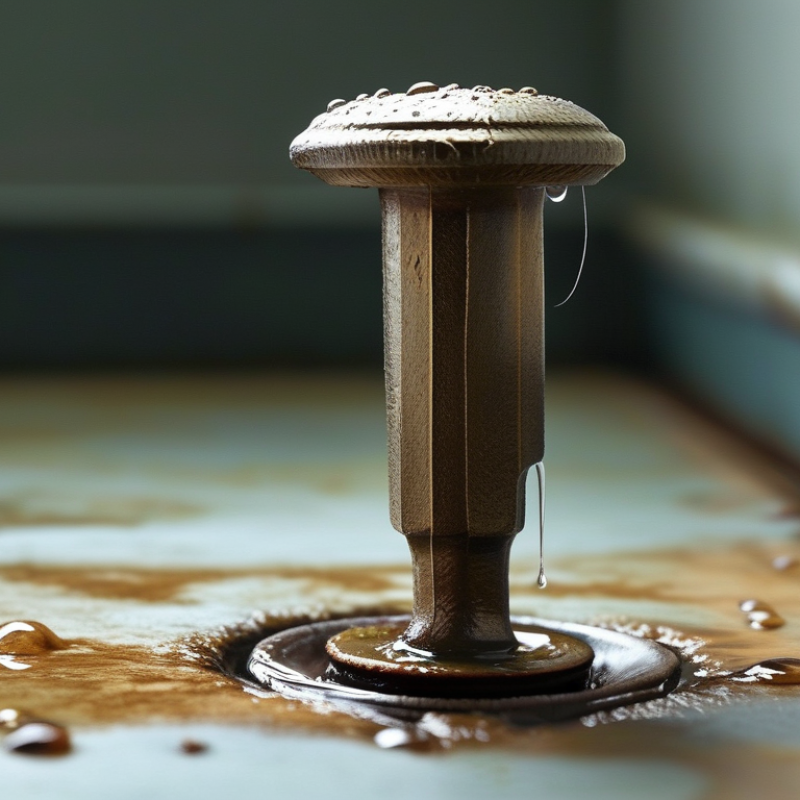
Why Is My Sink Stopper Not Working Properly?

How a Sink Stopper Works and What Proper Operation Looks Like

Why Is My Sink Stopper Not Working Properly?

How a Sink Stopper Works and What Proper Operation Looks Like

A sink stopper uses a simple linkage beneath the basin. The lift rod moves a clevis strap, which pulls a pivot rod. That rod raises or lowers the stopper inside the drain. When closed, the stopper should sit evenly against its seal and hold water without leaking. When open, it should lift high enough for water to pass freely. The movement should feel firm, not loose or strangely angled.

A stopper may fail when the pivot rod slips from its opening, the linkage bends, or hair gathers around the stopper. Mineral deposits can also prevent a clean seal. I once tightened the lift rod too much and made the stopper harder to move. That was not the real fix. The linkage was slightly misaligned. Proper operation can look less perfect than expected, but the stopper should not wobble or drop suddenly.

Tips: Remove the stopper and rinse away buildup. Check that the pivot rod enters the stopper’s bottom hole. Adjust the clevis holes gradually, then test the water level. A small flashlight helps under the basin. If the drain still leaks, inspect the rubber seal for cracks. Do not force corroded parts; forcing them can damage the drain assembly. Photograph the linkage before removing anything, because reassembly is surprisingly easy to get wrong.

Common Reasons a Sink Stopper Fails to Open, Close, or Seal

Why Is My Sink Stopper Not Working Properly?

A sink stopper can fail in three different ways: it may not open, close, or seal. When it will not open, inspect the lift rod beneath the faucet. The connecting clip may have slipped, or the pivot rod may be bent. Hair and soap can also trap the stopper inside the drain body. Pull gently. Do not force it.

When the stopper will not close, check its height and alignment. A loose adjustment nut can leave the stopper sitting too high. Mineral deposits around the drain flange may block full movement. A stopper that closes but still leaks often has a hardened rubber seal, a damaged washer, or debris beneath its rim. The U.S. Environmental Protection Agency’s WaterSense program estimates household leaks can waste more than 10,000 gallons yearly. A small sink leak deserves attention.

The Water Research Foundation’s Residential End Uses of Water study found leaks represent about 12% of indoor household water use. That figure includes more than sink stoppers, but it shows why sealing matters. In my repair experience, cleaning the stopper and drain opening solves many problems. I have also replaced parts too quickly. That was not always necessary. First, photograph the linkage, remove buildup, and test the stopper several times. If the pivot rod feels loose or corrosion has weakened the drain assembly, replacement may be safer than repeated adjustment. Check underneath the basin for dampness after testing.

Why Is My Sink Stopper Not Working Properly?

Hair and soap buildup are the most common reasons a sink stopper fails to open, close, or seal. Linkage problems, loose pivot rods, worn seals, and misalignment can also prevent proper movement or allow water to drain. The percentages represent a practical troubleshooting distribution of common failure causes.

How to Inspect the Stopper, Rod, Lift Bar, and Drain Assembly

A sink stopper can fail even when the handle moves normally. I learned this after finding toothpaste buildup beneath the stopper.

Lift the stopper and inspect its rim, underside, and rubber seal. Look for hair, mineral scale, cracks, or a bent edge.

Rinse loose debris with warm water. Do not force brittle parts. A flashlight can reveal hidden buildup around the drain’s crossbar. This simple inspection often explains slow drainage better than the handle itself.

Check the lift bar beneath the faucet. It should move smoothly and hold its position without excessive looseness. If it feels slack, inspect the connecting rod below the sink.

The rod should pass through the strap and align with the stopper’s hole. A misplaced clip may make the stopper rise only slightly. Remove the clip carefully. It is easy to drop into a dark cabinet.

Adjust one hole at a time, then test the water level. I sometimes expect a perfect seal too quickly, so I test it twice.

Inspect the pivot rod where it enters the drain assembly. Its rubber seal or washer should sit firmly without leaking.

Place a bucket beneath the drain before loosening anything. Tighten the retaining nut by hand, then make a small adjustment with pliers. Over-tightening can damage threads or restrict stopper movement.

If the stopper still slips, check for a bent pivot rod or loose drain flange. Replace worn seals with compatible parts, but keep the old piece for comparison. Some adjustments need patience.

Step-by-Step Ways to Repair or Adjust a Faulty Sink Stopper

Why Is My Sink Stopper Not Working Properly?

Step-by-Step Ways to Repair or Adjust a Faulty Sink Stopper

A sink stopper usually fails because of a loose lift rod, blocked linkage, or worn rubber seal. Start by placing a small bowl beneath the drain assembly. This catches water and prevents dropped parts from disappearing. Remove the lift rod clip under the sink, then pull out the pivot rod carefully. The stopper should lift from the drain opening. Check the seal.

Clean hair, soap residue, and mineral deposits from the stopper and drain flange. A soft brush works well. Do not scrape delicate surfaces with a sharp tool. Inspect the rubber seal for cracks or flattening. If it feels hard, uneven, or loose, replace it with a matching part. I once overlooked a tiny split near the edge, and the stopper still leaked after cleaning.

Reinsert the stopper with its opening facing the pivot rod. Slide the rod through the stopper hole, then tighten the retaining nut by hand. Reconnect the lift rod and adjust its clip position. Raise the rod slowly. The stopper should close fully without forcing the handle. Test the basin with a few inches of water. If the water drains while closed, move the clip slightly lower or inspect the pivot connection again. Do not overtighten the nut; it can restrict movement or damage the seal. When adjustment fails, the drain body may be bent or corroded, requiring professional inspection.

Why Is My Sink Stopper Not Working Properly? - Step-by-Step Ways to Repair or Adjust a Faulty Sink Stopper

Problem or Symptom Most Likely Cause What to Check Step-by-Step Repair or Adjustment Basic Tools Typical Time Difficulty
The stopper will not close fully Hair, soap residue, or mineral deposits are preventing the stopper from seating. Look for debris around the stopper edge and drain opening. 1. Lift the stopper out if the design allows it.
2. Remove buildup with an old toothbrush or plastic scraper.
3. Wipe the stopper and drain rim clean.
4. Reinstall it and test for a complete seal.
Gloves, toothbrush, cloth, plastic scraper 10–20 minutes Easy
Water drains away even when the stopper is closed A worn, cracked, or flattened rubber seal is allowing water to pass. Inspect the stopper gasket for hardening, gaps, cracks, or deformation. 1. Remove the stopper.
2. Compare the old seal with a matching replacement.
3. Clean the contact surface.
4. Fit the new seal evenly and test the basin with a small amount of water.
Adjustable pliers, cloth, replacement seal 20–40 minutes Easy to moderate
The lift rod moves, but the stopper does not move The clevis connection is loose, disconnected, or incorrectly positioned. Look under the sink for the lift rod, clevis, retaining clip, and pivot rod. 1. Reconnect the lift rod to the clevis.
2. Align a clevis hole with the pivot rod position.
3. Insert the pivot rod and secure it with the retaining clip.
4. Move the lift rod several times to confirm operation.
Flashlight, pliers, replacement retaining clip if needed 15–30 minutes Easy to moderate
The stopper opens but will not stay open The linkage is too loose, the clevis setting is unsuitable, or the pivot mechanism is worn. Check whether the lift rod has excessive free movement before the stopper begins to rise. 1. Loosen the clevis retaining screw or clip.
2. Move the clevis to a different hole to change the stopper travel.
3. Tighten the connection without restricting movement.
4. Test both the open and closed positions.
Small pliers, screwdriver 15–25 minutes Easy
The stopper is stuck in the drain The pivot rod is corroded, the linkage is jammed, or debris is caught beneath the stopper. Check whether the pivot rod can be removed and whether the stopper moves freely by hand. 1. Place a container under the drain connection.
2. Remove the pivot-rod retaining nut carefully.
3. Pull out the pivot rod and lift out the stopper.
4. Clean the parts and replace damaged components before reassembly.
Bucket, adjustable pliers, penetrating oil, cloth 30–60 minutes Moderate
The stopper sits too high or too low The stopper height has changed because the adjustment nut or linkage position is incorrect. Check the threaded stopper rod and the nut beneath the stopper. 1. Remove the stopper from the drain.
2. Turn the adjustment nut in small increments to raise or lower the stopper.
3. Reinsert the stopper and check the seal.
4. Lock the setting once the stopper opens and closes correctly.
Pliers or small wrench, cloth 15–30 minutes Easy
The stopper works intermittently A loose fastener, bent linkage, or partially blocked pivot area is causing inconsistent movement. Operate the lift rod repeatedly while observing every connection under the sink. 1. Tighten loose nuts and screws gently.
2. Straighten or replace a visibly bent linkage.
3. Remove debris from the pivot area.
4. Apply a small amount of plumber-safe silicone lubricant to moving joints if appropriate.
Flashlight, pliers, screwdriver, silicone lubricant 20–45 minutes Moderate
A leak appears around the drain assembly The drain flange, washer, or retaining nut is loose or the sealant has failed. Dry the pipes and watch for water appearing around the flange or drain connection. 1. Tighten the retaining nut slightly while supporting the drain body.
2. Do not overtighten, as this can damage the sink or washer.
3. If leakage continues, remove and reseal the drain assembly with suitable plumbing sealant.
4. Fill the basin and inspect all joints again.
Bucket, adjustable wrench, cloth, plumbing sealant 30–90 minutes Moderate to advanced
The stopper is clean but still does not seal The stopper or drain seat is damaged, distorted, or incompatible with the drain opening. Inspect for corrosion, uneven surfaces, deep scratches, or a mismatch in size. 1. Measure the old stopper and compare its shape with the drain opening.
2. Replace a damaged stopper with a correctly sized compatible part.
3. Confirm that the gasket contacts the drain evenly.
4. Test the seal before using the sink normally.
Tape measure, pliers, replacement stopper 20–45 minutes Easy to moderate
The drain remains slow after the stopper is repaired Hair and debris may be trapped below the stopper or in the trap. Check the drain opening and run water after removing the stopper. 1. Remove the stopper and clear visible debris.
2. Use a plastic drain tool or hand auger if necessary.
3. Flush with hot tap water.
4. If the blockage remains, clean the trap or contact a qualified plumber.
Gloves, plastic drain tool, bucket, hand auger 15–60 minutes Easy to moderate
Safety check: Place a bucket under the drain before removing any pivot rod, trap connection, or retaining nut. Stop the repair if the drain body, sink, or pipe connection is cracked or severely corroded.

When to Replace the Stopper or Seek Professional Plumbing Help

Why Is My Sink Stopper Not Working Properly?

A stopper usually fails because its rubber seal hardens, the pivot rod bends, or hair blocks the linkage. I have found that cleaning the drain opening often restores movement, but not sealing. Test it with two inches of water. If the level drops within several minutes, inspect the gasket and stopper flange. Replace the stopper when the seal is cracked, deeply stained, or still leaks after cleaning and adjustment. Small parts matter.

The U.S. Environmental Protection Agency estimates that household leaks can waste nearly 10,000 gallons of water yearly. A faulty stopper may not cause all that loss, but constant dripping signals a problem worth checking. The Water Research Foundation’s Residential End Uses of Water, Version 2 reports average faucet use of about 11.1 gallons per person daily. That makes a persistent sink leak easy to overlook, yet expensive over time. I once tightened a linkage too aggressively. It moved poorly afterward.

Call a licensed plumbing professional when water appears inside the cabinet, the drain remains blocked, or the stopper connects to corroded plumbing. Seek help if sewage odors return or the trap leaks after basic tightening. Hidden moisture can damage wood and encourage mold. The American Society of Home Inspectors advises investigating active leaks promptly, especially around cabinets and drain connections. Do not force a seized pivot rod. A replacement stopper is simple; damaged drain threads are not.